The Power of Triggers
Trigger function and trigger types
The trigger function plays an important role in configuring a Memory HiCorder. When recording high-speed transients, this functionality makes it easy to start and stop measurement based on complex patterns that would be impossible for a human operator to duplicate manually.
The following introduces some Memory HiCorder trigger functions.
The following figure shows the types of trigger sources supported by Memory HiCorders.
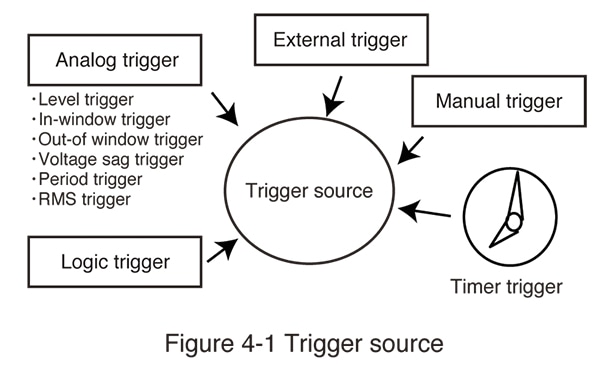
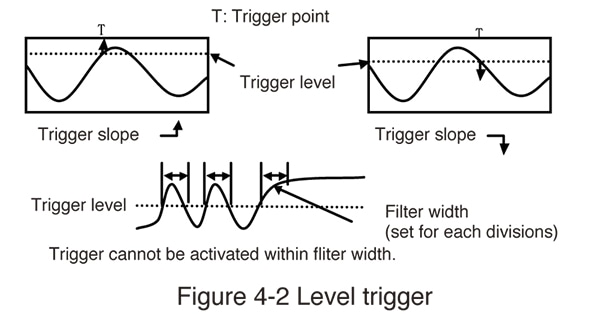
■ Level Trigger
The level trigger is activated when the input voltage either rises above or falls below a set trigger level. A trigger filter can be set to keep the trigger from being activated by noise or other phenomena.
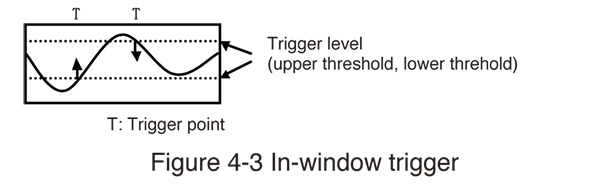
■ In-Window Trigger
Triggering occurs when the signal enters (IN) the defined upper and lower threshold range.
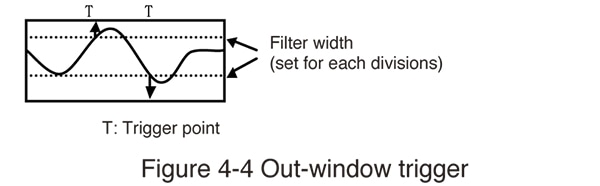
■ Out-of-Window Trigger
Triggering occurs when the signal exits (OUT) the defined upper and lower threshold range.
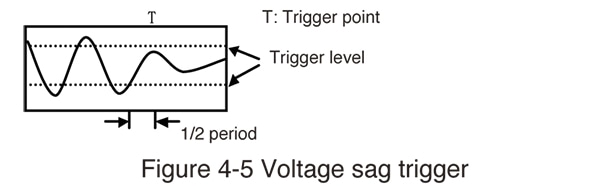
■ Voltage dip Trigger
Phenomena such as momentary voltage dips and power outages can be detected using a trigger designed specifically for use with commercial power supplies (50/60 Hz). The user sets a peak value (or an RMS value), and the trigger is activated if input falls beneath that level.
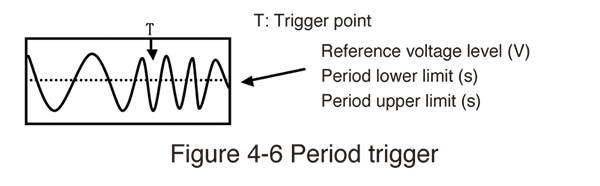
■ Period Trigger
Triggers can be activated when the period is outside of the specified time width, based on frequency variation and so on.
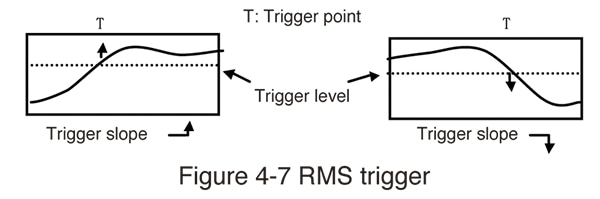
■ RMS Trigger
Triggers can be activated based on RMS levels.
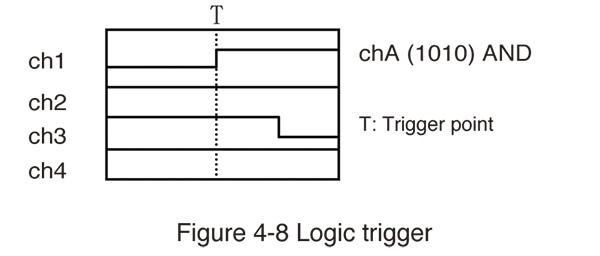
■ Logic Trigger
Triggers can be activated according to signal input on logic channels.
■ Timer Trigger
Triggering occurs at the specified interval from the specified Start time until the Stop time.
Start ‘00-1-1 0:00
Stop ‘00-1-2 0:00
Ineterval 1:00
■ External Trigger
The external trigger is activated based on an external signal. The trigger is activated using a no-voltage contact signal or a 5 to 0 V signal. The external trigger has two inputs and outputs so that trigger output can be connected to another Memory HiCorder to enable simultaneous trigger operation.
■ Manual Trigger
Triggers can be activated by pressing the manual trigger key.
Trigger mode
Select from the below setting modes whether to record one recording length per trigger event, or to record continuously.
■ Single mode
Only one trigger activation is accepted by the instrument. When the trigger activates once, the waveform is recorded for the set recording length, and then measurement stops.
■ Repeat mode
Repeated trigger activations are accepted by the instrument. When no trigger has been activated, the instrument enters the trigger standby state.
■ Auto mode
Repeated trigger activations are accepted by the instrument. If no trigger is activated after approximately 1 s, the instrument automatically records the waveform for the recording length.
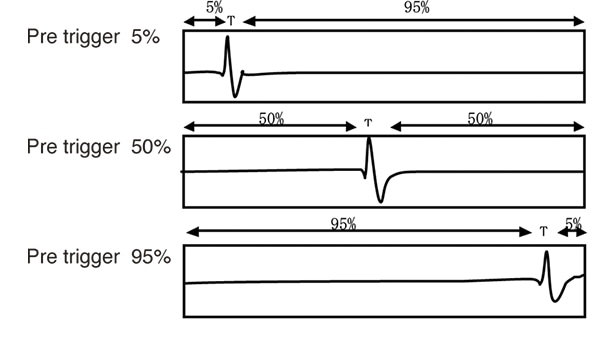
Trigger start point (Pre-trigger)
The user sets the trigger point as a percentage, using the recording start point for the set recording length as 0% and the recording stop point as 100%. By setting this pre-trigger, it is possible to review conditions before the trigger (malfunction or anomaly) occurred.